댓글 쓰기 권한이 없습니다. 로그인 하시겠습니까?
|
Pi
2018.04.26 10:42
라즈베리파이 음성인식 S/W
조회 수 9884 댓글 0
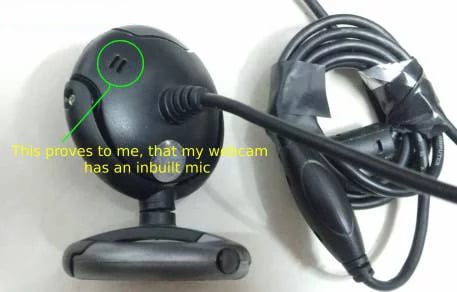
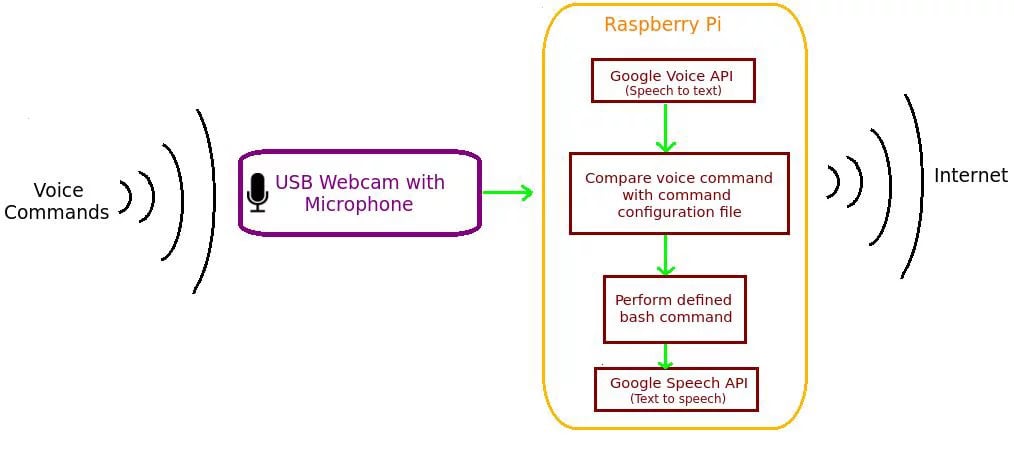
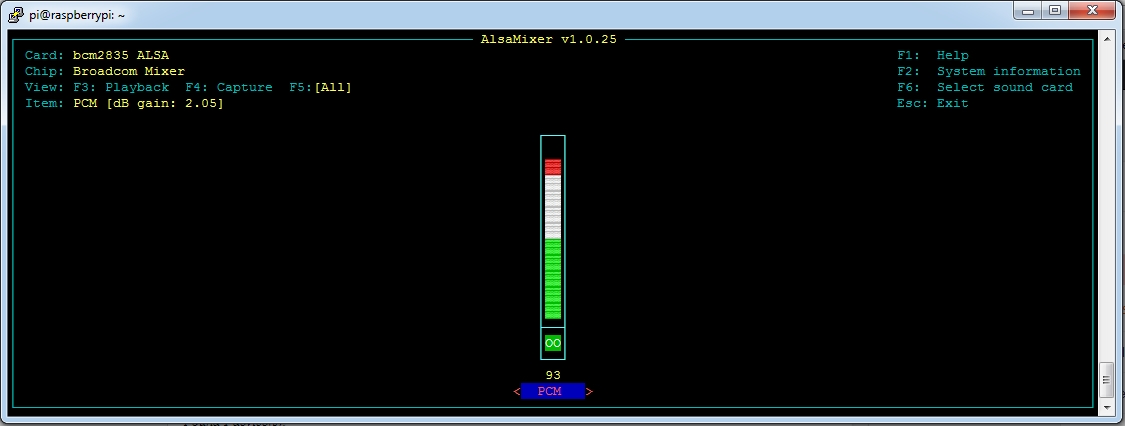
https://maker.pro/raspberry-pi/tutorial/the-best-voice-recognition-software-for-raspberry-pi On a mission to find the best voice-recognition software for Raspberry Pi, I installed and tested three different systems. Two were internet-dependent and one was offline. Out of these three, the Voice Control software created by Steven Hickson seems to be the most precise and potent. The Jasper system, even though it works offline, compromises accuracy and speed. This would be useful for systems that have no access to the internet, though. A small caveat: The system takes up almost a whole 4GB memory card, so use at least an 8GB card with it. Some of its services are cumbersome and take a lot of effort from the user to pronounce repeatedly until the system picks it up. The softwares presented by Oscar and Steven use Google voice APIs, they are very accurate and precise. Both of them also use Google speech, so the system can be manipulated to talk back and respond to your commands and queries. But I prefer the third software because it has a simple and straightforward interface. Here, you will be able to define each of your voice commands and link them to particular tasks in the form of bash commands. These are defined inside a configuration file. Following is a detailed tutorial explaining the installation and use of this voice recognition software for Raspberry Pi. The video at the bottom gives you a feel for the voice control software before you install it. You cannot use normal microphones with audio jacks because the raspberry pi does not have a sound card. Hence, only use USB webcams with inbuilt mic or USB microphones. I am using a cheap USB webcam with an inbuilt mic. How Does the Voice Recognition Software Work? The software being described here uses Google Voice and speech APIs. The voice command from the user is captured by the microphone. This is then converted to text by using Google voice API. The text is then compared with the other previously defined commands inside the commands configuration file. If it matches with any of them, the bash command associated with it will be executed. You can also use this system as an interactive voice response system by making the Raspberry Pi respond to your commands via speech. This is achieved by using the Google speech API, which converts the text into speech. Here's a block diagram showing you the basic working of the voice recognition software for Raspberry Pi: Step 1: Checking Your Microphone You need to first check whether your microphone records properly. First, check if your webcam or microphone is listed using the command "lsusb". Check if your mic/webcam comes up on the list. Next, we need to set the mic recording volume to high. To do this, enter the command "alsamixer" in the terminal. On the graphical interface that shows up, press the up/down arrow keys to set the volume. Press F6 (all), then select the webcam or mic from the list. Again, use the up arrow key to set the recording volume to high. Now, you need to check if the recording takes place properly. Use the command “arecord -l” to check if your mic/webcam is listed. Then, use the command “arecord -D plughw:1,0 test.wav” to record sound. The sound will be recorded in the file “test.wav”. To listen to it, plug in your headphones to the pi and enter the command “aplay test.wav” in the terminal. If you’re able to hear the sound, your microphones works perfectly, else try adjusting the volumes and repeat the previous steps. STEP 2: Installing the Voice Recognition Software for Raspberry PiThis software was created by Steven Hickson and utilizes Google voice API. To install this software, execute the following commands one after the other:
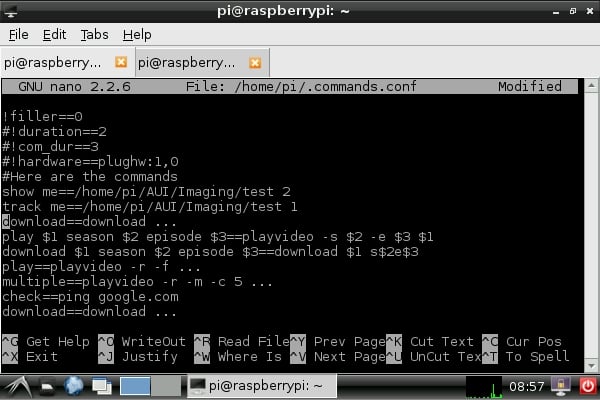
Please, not that the wget command in the first line uses two dashes (- -) before “no-check”. During the installation, several questions shall pop up. You need to read these carefully and press y/n accordingly. I would recommend you to press y for all of them.Some of the questions include: Do you want to set a keyword? (Keyword is a voice command like a name, the system gets activated only when first use this command), Do you want to set filler flag to zero? (Press y, else you will always hear “Filler Fill” before every speech response from the pi) , Do you want to install youtube-dl? (A terminal service for playing youtube videos), etc. Options for changing the listening duration and system response is also presented during the installation. Read carefully each of these questions and respond accordingly. STEP 3: Using the Voice Control Software and Setting Up Your Own Commands You can verify the voice-to-text conversion by running "./speech-recog.sh" in the directory: /home/pi/PiAUISuite/VoiceCommand. The software is activated to run continuously when you execute the command "sudo voicecommand -c" in the terminal. By default, the keyword used to activate it is "Pi" — only after saying "Pi" while it is listening can you execute the other commands. Check out the video below to get a feel for the software. I would recommend changing the keyword from "Pi" to something else, as the system usually interpreted it for me as "Hi". You can change the keyword and other voice commands and actions by opening the commands configuration file. To do this, enter the command "voicecommand -e". Inside this, you can see various options for setting the keyword, the speech response, etc. Please remove the "#" before the lines in the file when changing them. Here, each command is linked to a particular action, e.g., "Youtube==youtube-search ..." When you say, for example, "Youtube android", it runs the command "youtube-search android" in the bash. The "..." stands for anything you say after the command "Youtube". In the case of the voice command definition: "play $1 season $2 episode $3 =playvideo -s $2 -e $3 $1". So when you say, for example, "play Big Bang Theory season 1 episode 4", it executes the command "playvideo -s 1 -e 4 Big Bang Theory", i.e., it plays the fourth episode of the first season of The Big Bang Theory. So, if you want to add a new voice command to this — like "check internet" that uses "ping" to check your internet connection — in the configuration file, enter a line like this: "check internet==ping google.com". It executes "ping google.com" when you say "check internet". Use this system for home automation, robotics, and other cool stuff. This software is fast and accurate for your applications. Now, the video of the voice control software in action: Dreamy의 코드 스크랩내가 모으고 내가 보는
| ||||||||||||||||||||||||||||||||||||||||||||||||||||||||||||||||||||||||||||||||||||||||||||||||


